Coverity on Polaris for Azure DevOps
The Coverity on Polaris plug-in for Azure DevOps enables you to invoke Coverity on Polaris analysis from your continuous integration (CI) pipeline builds in Azure DevOps, which result in a pass or fail for the build. The Coverity on Polaris plug-in for Azure works with Azure DevOps jobs in Azure Pipelines, which works to constantly and consistently test and build your code. This Coverity on Polaris plug-in enables you to invoke different Coverity on Polaris analysis options on your builds in Azure Pipelines and fails a build when there are one or more issues found in the scan results. When you commit code to a repository, a build can be triggered and the Coverity on Polaris scan returns a pass or fail status for that build.
Coverity on Polaris incremental analysis (LCA) in Azure Devops enables you to scan files (changeset) that represent the difference between the current build and the last successful build.
Users and roles
- API token in Coverity on Polaris to use with the plug-in so that it can access a Coverity on Polaris instance.
- Administrator permission in Azure to install the Coverity on Polaris plug-in.
Basic workflow
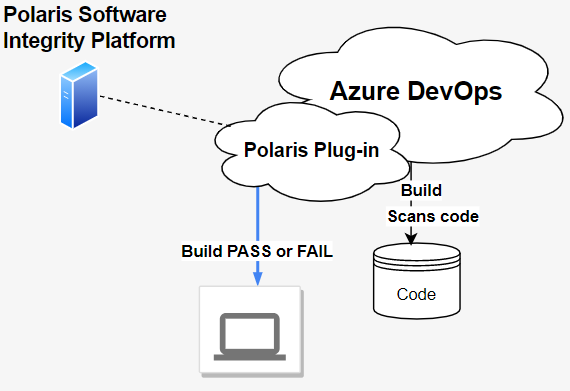
The following describes a high-level overview of the workflow.
- You commit code to a branch in your repository.
- You run a build on a local Microsoft build agent.
- The plug-in downloads and installs the Coverity on Polaris CLI and executes it using the Coverity on Polaris YAML file that you checked into the source repository.
- The Coverity on Polaris CLI captures your code and sends it to Coverity on Polaris
for analysis. A link to results in Coverity on Polaris is provided when you run
the Coverity on Polaris command using the
-woption. - The plug-in can check for issues when the Coverity on Polaris task in finished and fails the build if issues are found.
Configuration overview
The following is an overview of the steps to set up the Coverity on Polaris plug-in.
- Create an organization and project in Azure.
- Install the Coverity on Polaris plug-in from the Visual Studio Marketplace.
- Create a self-hosted build agent.
- Create a pipeline in your project.
- Add a project to your repository and include a Coverity on Polaris YAML file.
- Create a task in the pipeline to add the plug-in.
- Configure the plug-in by adding a new Coverity on Polaris service endpoint using the Coverity on Polaris instance URL, and API key.
- Add an agent job. If you've already created a self-hosted build agent, you can select it here. Otherwise, you can select the default option which is a Microsoft hosted agent.
- Queue or save and queue to run a build.
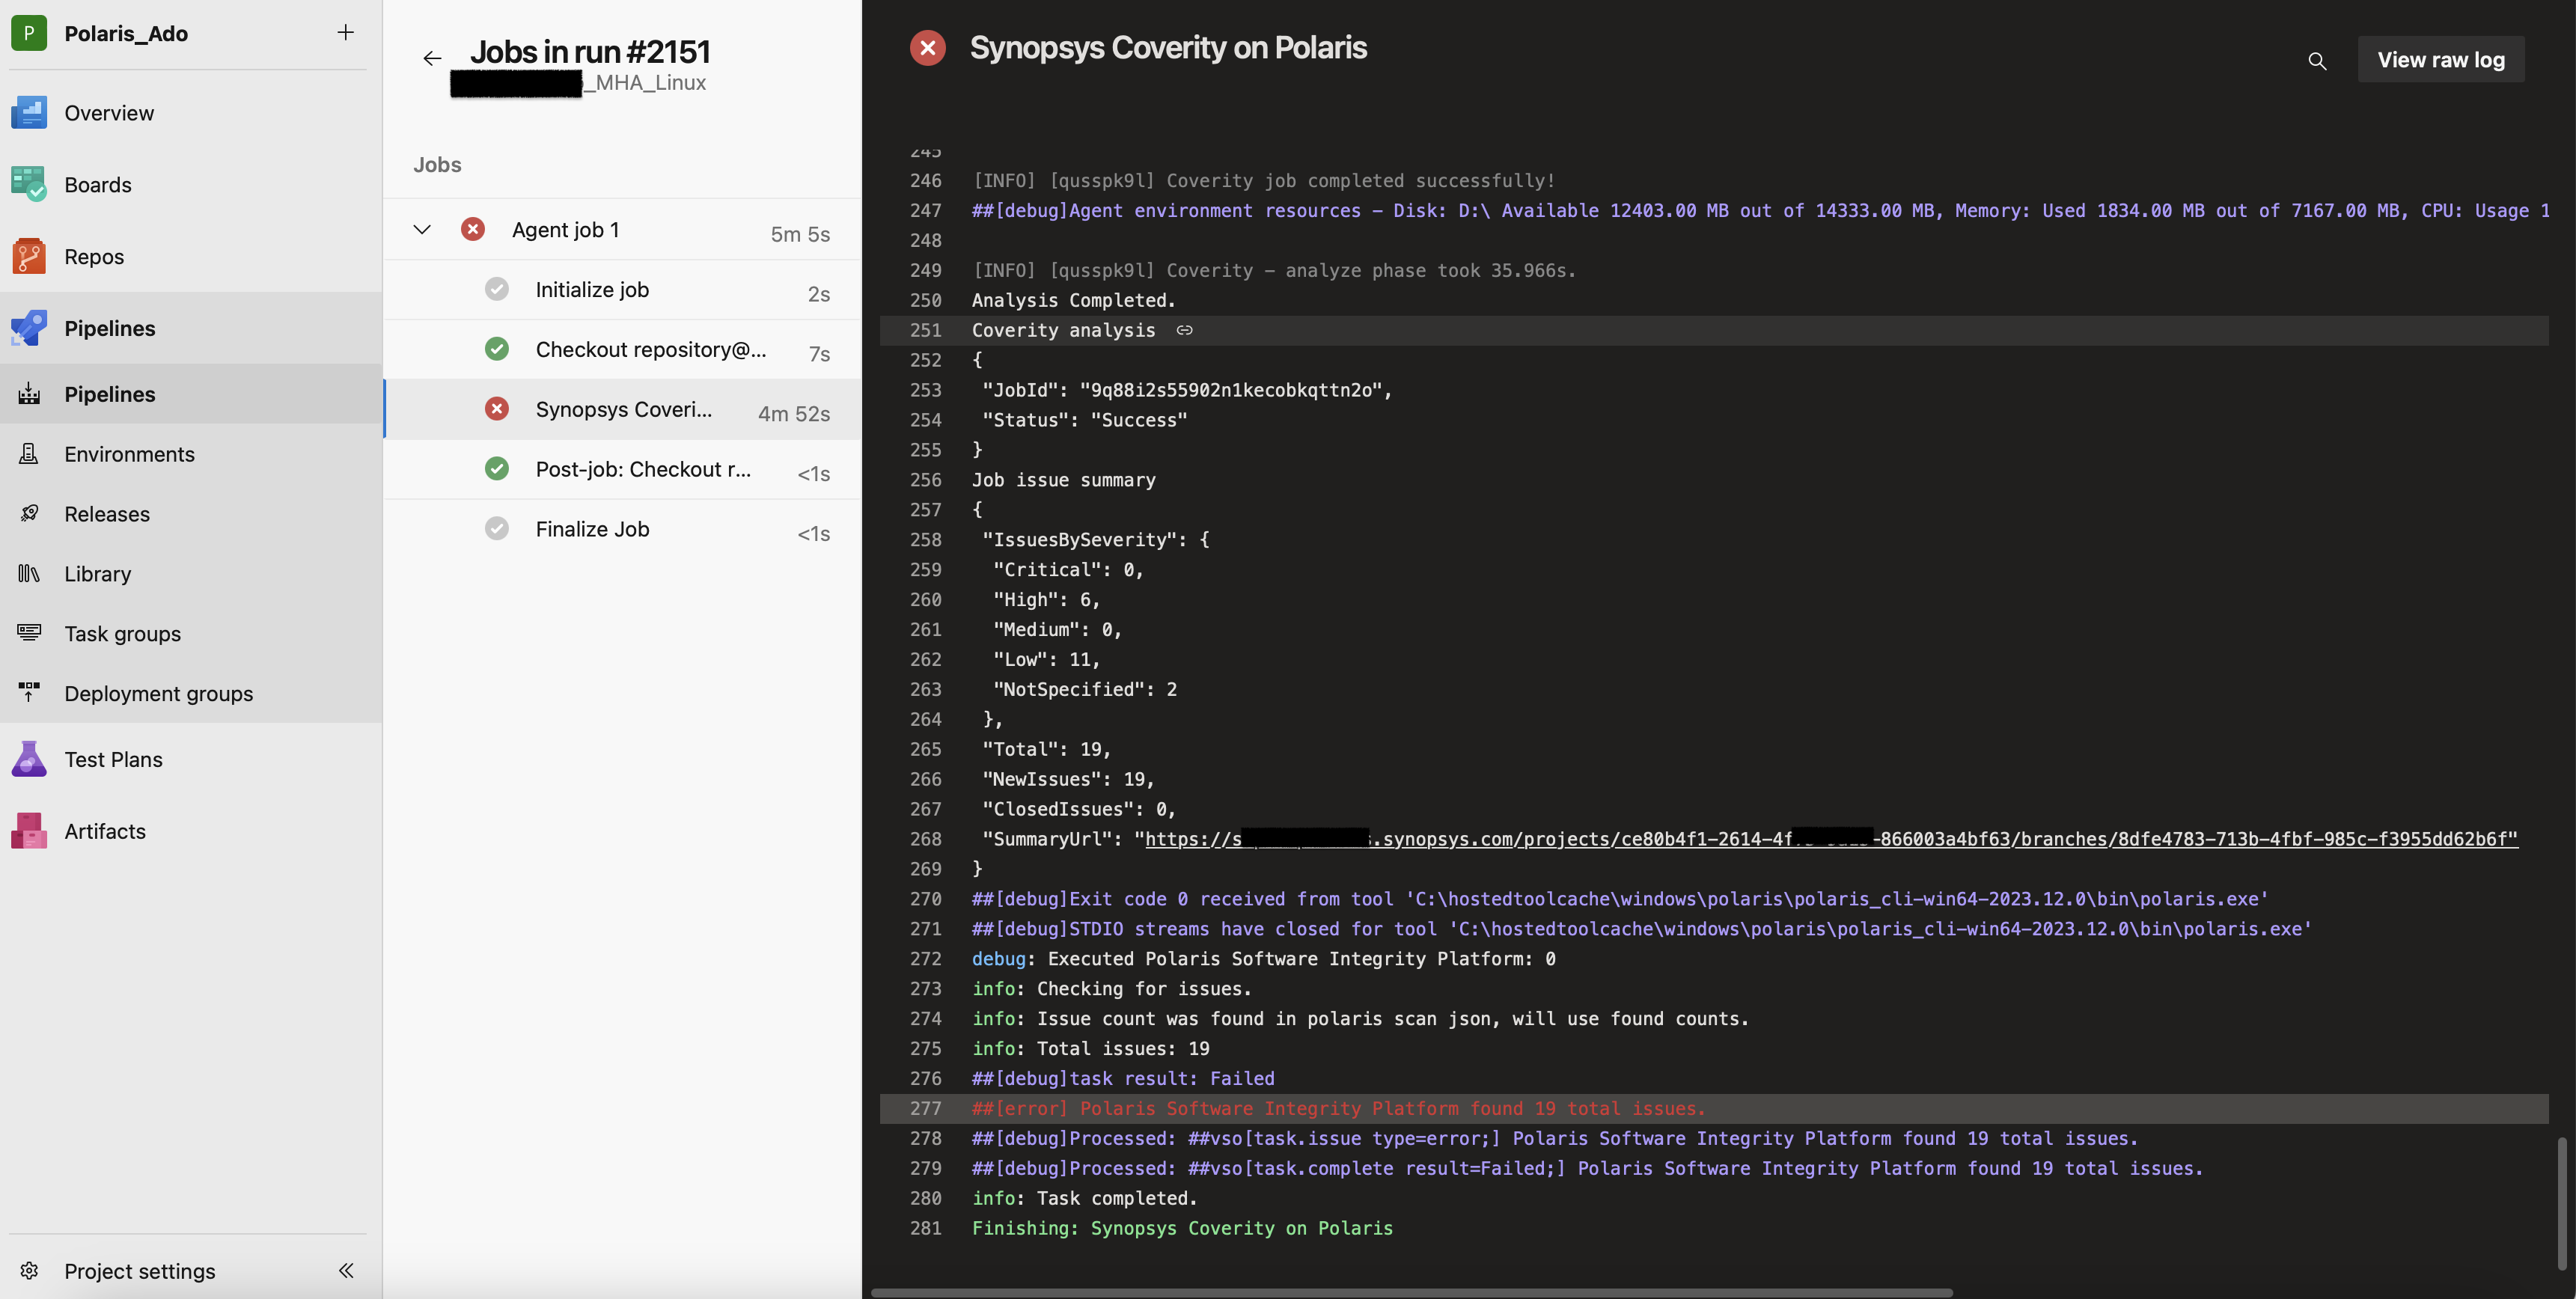
- View the results to check if the build passes or fails.